
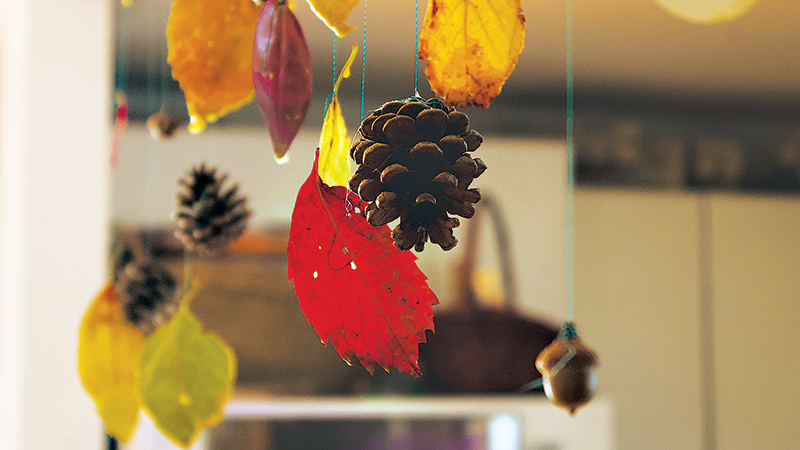
Beeswax Dipped Leaves
Each year the kids and I gather in the kitchen on a dreary fall day and do this craft together. It’s become a seasonal tradition we love, thanks to the warming smell of beeswax and the beauty of the leaves surrounding us. I love that it’s a short-lived but much-loved activity.
This is an activity that older kids can tackle alone but requires some help from an adult for younger kids.
You will need:
A couple of ounces of beeswax (pellets are easiest but not necessary)
OR vegan soy wax, which can easily be substituted.
A handful or more of beautiful leaves.
1) Melt beeswax (available from a local apiary or online, or you can
use a beeswax candle) in a container you don’t mind committing
to beeswax for all of eternity. It doesn’t come off very easily, so
I have a pot specifically for beeswax work, but you can also use
an empty tin inside a pot of water to create a double boiler.
2) When the wax is fully melted, remove from heat and set on a pot
warmer. Lay sheets of parchment paper for everyone to work on.
3) Carefully grab a leaf by the tip of the stem and dip each side flat
into the wax.
4) Lay on the parchment to dry.
5) Use clothespins or string to tie and suspend.
6) Use your leaves as fall or winter decor, add to a brown paper
wrapped gift as an embellishment, or hang in a window for a
beeswax smell in the afternoon sun.
Once your leaves have lived their best life, they can easily be composted because your seasonal decor is 100% biodegradable. Typically, we hang ours in a central place, usually on a piece of jute string, stretched across a wall (they also make a great addition to a Christmas tree, but I won’t go there yet!) The red leaves tend to lose their colour the quickest, but the wax does help to preserve the leaves for many months.
Jacquelyn Toupin lives with her family in a heritage farm house that has been in her family for several generations. You can follow them on YouTube @oldfarmnewfarm or on Instagram @raisinghay